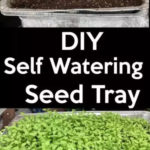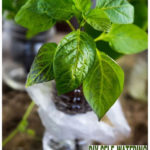
The whole gardening journey usually begins with the seeds. You should always try to make sure that your seedlings are well taken care off, in order to ensure their survival. In the past I have used the diy self watering plastic bottle seed starter and diy soil seedling starter blocks. Another great option would be to use these diy self watering seedling containers.
No doubt, you have run into many different container garden ideas over the years. This particular one is special as it allows you to reuse or recycle containers you would have otherwise thrown away. The advantage is that you can make them any size really, it all depends on the materials you have available. It takes less than 10 minutes to set up these containers.

-------------------------------------------------------------------
Here’s What You’ll Need:
- empty ice cream or yogurt container
- utility knife
- larger plastic container
- wicking cloth
- seed starter mix
- seeds
Step By Step Instructions
Step 1.
Use your utility knife to cut two slits in the
bottom of your container, one on either end.
Step 2.
Poke a few more extra holes for drainage.
Step 3.
Pull your wicking cloth through one slit, and
out through the other end.
Step 4.
Fill your container with starter mix, plant
your seeds and water lightly.
Step 5.
Add water to the larger container, and sit
the container with potting soil inside.
As long as there is water inside the reservoir, the wicking cloth will suck it up and in turn keep your potting mix moist. This type of container can be used to grow your seedlings, just before they are ready to be transplanted to bigger pots or outside. The minimal cost, makes it worth your while to set these up for your seedlings.
You can watch the video below on DIY Self Watering Vegetable Planter…