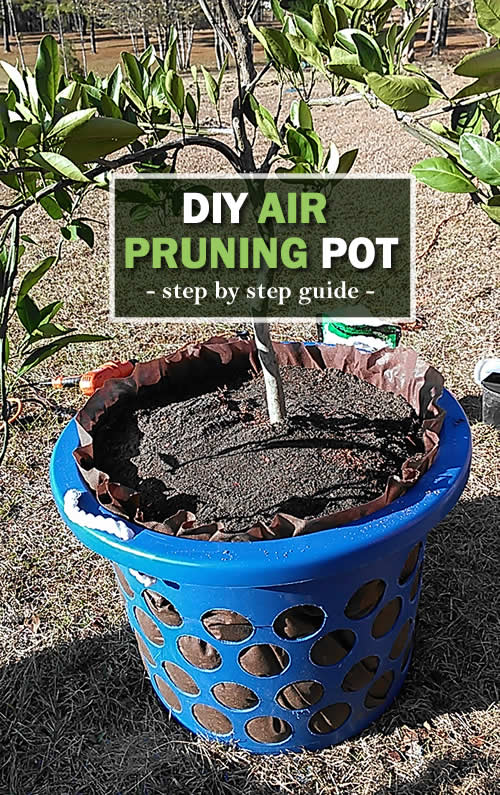
Oh yeah, we are going to be pruning some air today! Really, like literally… LOL! Ok, I’m kidding. What we are actually going to be doing is trying to build this diy air pruning pot. It should be a walk in the park, considering the fact that we’ve built this diy garden kneeling pad, this diy cold frame raised garden bed and this diy garden squash arch in previous posts.
It’s always a lot of fun tackling these interesting diy gardening projects. If you are not familiar with what ‘air pruning’ is, it is when a plant’s roots are exposed to air. As a result they are pruned as the plant is growing versus when it is transplanted. The benefits of using this method include faster growth after transplant due to the plant having experienced less transplant shock. Ultimately, they may also be an increase in yield as well as more resistance to disease and root rot.
-------------------------------------------------------------------
Here’s What You’ll Need:
- plant pot
- 25 gallon bushel barrel
- handheld drill
- metal file or razor
- 2″ hole drill bit
- potting mix
- landscape fabric
- 10-10-10 fertilizer
- perlite
- Epsom salts
Alright, you’ll need to grab that drill and start drilling some holes in the bottom of the barrel. The side holes are next, just don’t forget to file down all the holes once you have drilled them. The landscape fabric is wrapped inside the barrel so it can trap the potting soil. The potting soil is mixed with some perlite, epsom salts as well as the fertilizer.
You can get step by step instructions on Instructables, here…
DIY Air Pruning Pot Instructions
You can watch the video below on Make Your Own Air Pruning Pot…
You can watch the video below on How to Convert Normal Pot Into Air Pruning Pot…
You can watch the video below on Do This to Grow Plant Faster 1000 times | Air Pruning DIY …